CNC router – part II
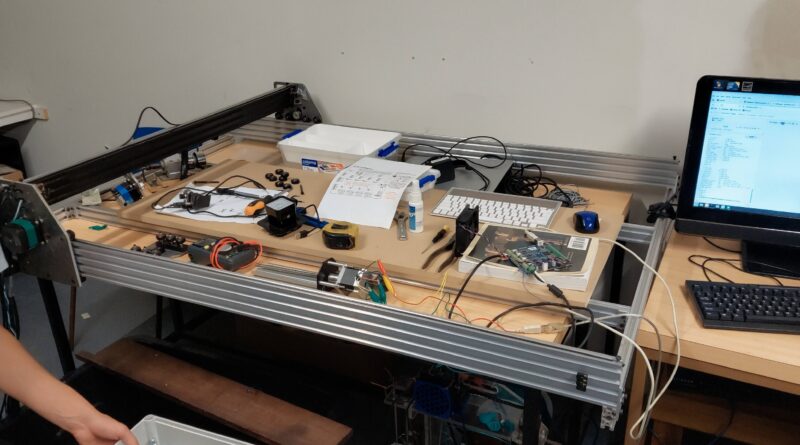
Had another interesting meetup at the Newcastle Makers Meetup group last night. We were once again looking at the CNC router. Not a bad project for me as it involves a lot of aspects I am interested in but have not worked with before.
There are a few steps to complete before we would be able to use it. At present, the list is:
- Install a control board to contain the components and to put the emergency stop on
- Confirm the wiring is correct and repair and/or correct if it isn’t
- Ensure the base is suitable and if not, put it on a suitable base
- Confirm all components are working correctly and calibrate if not
Last night, we were not able to correctly connect some of the wires in a suitable way. We need to get some suitable plugs so we can connect and disconnect as required.
We installed the z-axis motor but we have decided the current wooden support should be swapped out for something more rigid. It will either be a steel plate or a 3d printed piece. Both approaches have their challenges even if the task is relatively simple (width of the channels from center to center was 40mm).
Felix was able to show me the initial steps in making a 3d model in Auto S Cad. I intend to explore that, maybe alongside the freeCAD program I want to learn.
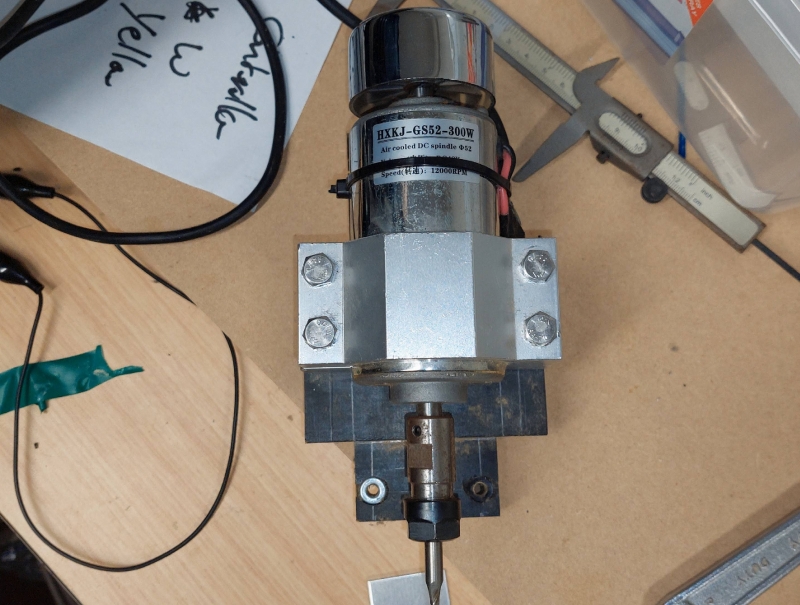
Lance had been exploring a program called ‘Image J’ which can give the dimensions from an image and a few measurements. So, to use that, I should be able to take these images…
 |
 |
…and a few measurements, such as width of 84mm and height of block of 50mm and from that, get all required dimensions to make a 3d model. It will be interesting to give it a go.
I was wondering how difficult it would be to make one of these myself. Don mentioned he used a supplier in Melbourne for the aluminum extrusions: RM Aluminium and Fasteners
I imagine we’ll have it working in the next few months…